
Latte art
Pour like the counter.
Free and honest: milk, microfoam, and the four latte art designs everyone starts with. From people who pour every day.
Milk school.
Before the latte art: how much milk goes into which coffee, how to texture it, and how each milk behaves.
The drinks, and their milk
How much espresso, how much steamed milk, how much foam. Layered bottom to top, with rough amounts.
Espresso (30 ml)
No milk. The base of it all.
1 shot · 30 ml
Espresso Macchiato (~35 ml)
Espresso, just marked with a dab of foam.
1 shot · 30 ml + a dab of foam
Cortado (60 ml)
Equal espresso and warm milk, barely any foam.
1 shot · ~30 ml milk · about 60 ml
Flat White (180 ml)
Double espresso, silky milk, a thin microfoam.
2 shots · ~120 ml milk · about 180 ml
Cappuccino (150–250 ml)
The classic third each: espresso, milk, foam.
1 shot · 60 ml milk · 60 ml foam · small 150 / large 250 ml
Caffè Latte (300 ml)
Lots of milk, a thin cap of foam. The mildest.
2 shots · ~200 ml milk · about 300 ml
Latte Macchiato (~280 ml)
Layered milk, espresso, and a tall foam top.
1 shot · ~250 ml milk · tall glass
Matcha Latte (~220 ml)
Same steamed milk, whisked matcha instead of coffee.
1 scoop matcha · ~200 ml milk
The perfect texture
You are after wet paint: glossy, silky, with no bubbles you can see. Two moves get you there.
Stretch
In the first two to three seconds, keep the tip just under the surface for a soft hiss of air.
Roll
Then submerge the tip and spin the milk into a smooth whirlpool until it folds in on itself.
Heat
Stop at 60 to 65 degrees: the jug is almost too hot to hold. Never boil, it scorches and kills the sweetness.
Fill the jug just below the spout, and swirl it before every pour so it stays glossy.
Every milk, and how to foam it
Two things decide it. Protein builds the walls of the bubbles, so it sets structure and stability. Fat makes the foam creamy and rounds out the taste. More protein means a steadier foam; more fat means more creaminess. Barista editions are tuned for exactly this.
Whole cow's milk
The benchmark, and the most forgiving. Its high protein builds a fine, stable foam, and the fat makes it creamy and lightly sweet. Handles beginner mistakes best of all.
Tip Cold and fresh from the fridge. The easiest choice for latte art.
Oat, barista edition
The best plant option, closest to milk. Naturally lower in protein, but barista editions add a little oil and stabilisers, so they foam almost like milk. Naturally sweet and easy against espresso.
Tip Always the barista version. Steam a touch cooler. Plain oat barely foams.
Soy
The highest-protein plant milk, so it foams well and holds its shape. The catch: the protein can curdle against hot, acidic espresso.
Tip Steam cooler (max 60 degrees) and pour promptly, then it will not split.
Almond and the rest
Nutty and light, but the trickiest to foam: little protein means thin, airy foam that collapses fast and separates from the coffee.
Tip Barista edition only, low heat, pour straight away.
Best cow's milk: whole, fresh and cold. Its protein and fat build the steadiest foam; low-fat froths bigger but drier and falls apart faster.
With any plant milk: use a barista edition, steam cooler (around 55 to 60 degrees), and wipe and purge the wand after, they scorch fast.
What can happen, and how to fix it
The usual snags at the milk stage, and the quick fix for each.
The white sinks, no pattern
You poured too high or too early. Get the spout closer to the surface before the white should show.
Big bubbles on top
Too much air, or air added too late. Stretch only in the first seconds, then submerge the tip. Tap the jug and swirl to pop bubbles.
Foam too stiff to pour
Over-stretched. You want wet paint, not meringue. Less air, more spinning.
No contrast, all pale
The base was not blended in. Start higher and thinner to mix with the crema before you drop close.
The designs
Four designs, easy to hard.
Each builds on the last. Once the heart sits, the rest comes much easier.
Heart
BeginnerThe starting point for everything. You pour a round white pool into the centre, then slice through it to pull the tip.

- Pour the textured milk in from a height into the tilted cup until it is about half full and still mostly brown.
- Lower the spout almost onto the surface and pour steadily into one spot. A white circle blooms and rises.
- When the circle nearly fills the cup, lift and cut a thin stream straight through its middle to the near edge. That pulls the point.
Rosetta
IntermediateThe classic leaf. A steady side-to-side wobble of the jug lays down rows of leaves, then one line ties them together.
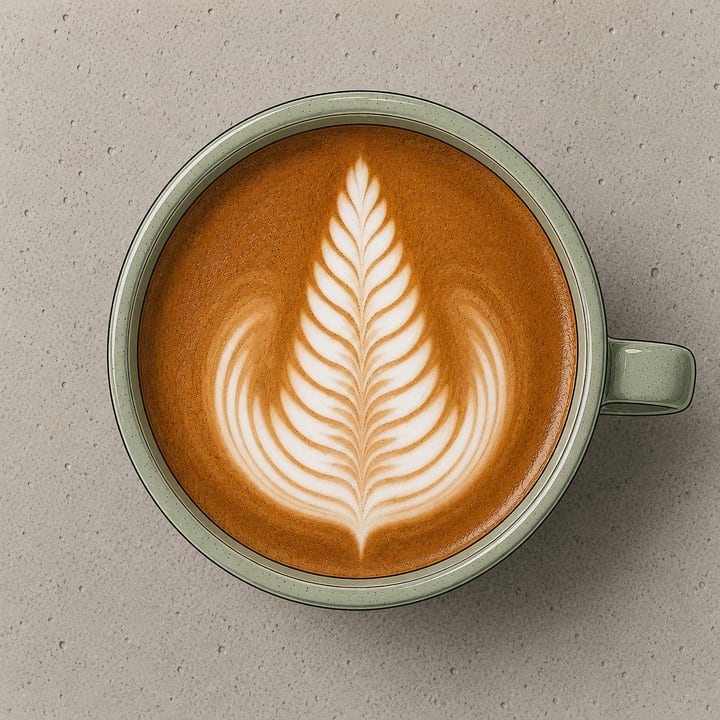
- Build the brown base as before, then bring the spout down close near the far side of the cup.
- Start a small, even wobble left and right and very slowly drift the jug back toward you. Each wobble drops a leaf, and they fan out.
- At the near edge, stop wobbling, lift, and draw one thin line straight back through the centre. That is the stem.
Tulip
IntermediateStacked hearts. You pour several separate pushes of white that shove into each other, then finish with a heart on top.

- On the brown base, drop close and pour a small round blob, then stop the pour completely.
- Pour a second blob just behind the first; it pushes the first one forward into a bump. Repeat two or three times.
- For the last one, pour a slightly bigger heart and cut a line straight through all the layers to a single point.
Swan
AdvancedThe showpiece, and really a rosetta plus a heart. One side becomes the feathered wing, a thin line the neck, a small heart the head.

- Pour a rosetta into one half of the cup. That is the wing and the tail of the swan.
- From the top of the wing, lift slightly and drag a long, thin, curved line out and around. That draws the neck.
- At the end of the neck, drop close, pour a small round blob and cut through it. That is the head and beak.
A good pour needs a good spout.
Everything here is easier with a pitcher built for it: a sharp, precise spout and a balanced, heavier body. That is exactly what we make.
See the pitchersShips from Germany · 14-day right of return
Written by baristas, not a recipe set in stone. Every machine and milk is a little different; adjust as you go.